As most of you know, our house burnt down about a year and a half ago and we rebuilt a new beautiful home last June. We are still kind of in the process of replacing things especially furniture. I am not the kind of person who wants to just go buy a bunch of new furniture to fill my house. I like to wait until the right piece comes along. This means I still have some holes to fill, but hey, at least when they are filled they will be filled with something I love.
I have been looking for a chest for our basement for awhile and I decided to start looking at our local Craigslist in hopes to find some good deals. And then about a month ago it was as if all of the furniture stars were aligned! Hubby and I took a trip to Lexington, KY (Go CATS!) and I found this awesome little shop that sold
Annie Sloan's Chalk Paint and that was the first I had seen of it (yes, slightly behind in this neck of the woods...). I was in love! When we got back home I discovered that I couldn't buy it around here so I decided to just wait and get some one day when a project came along. Well, wouldn't you know, that week I found a nice big chest on Craigslist for $70 and I bought it! I knew then that I HAD to use some of the Chalk Paint on it. After much debate I decided to go with Barcelona Orange. We are not afraid of color in this house and I have a great picture to hang above it with some orange in it so why not? I ordered my Barcelona Orange Chalk Paint and some clear and dark Annie Sloan wax to go along with it. The chest was in decent shape but had a lot of wear and tear to it. But the fabulous thing that I had read about this paint was that there was NO prep work. No need to sand, no need to prime, nothing. SOLD.
Here is the before-just your typical chest with old hardware
I removed the hardware, cleaned it up and got ready to slap the first layer of paint on. After layer one dried (quickly I might add) I decided I wanted to add another coat. This all just depends on what kind of look you are going for. Here is how it looked after one coat:
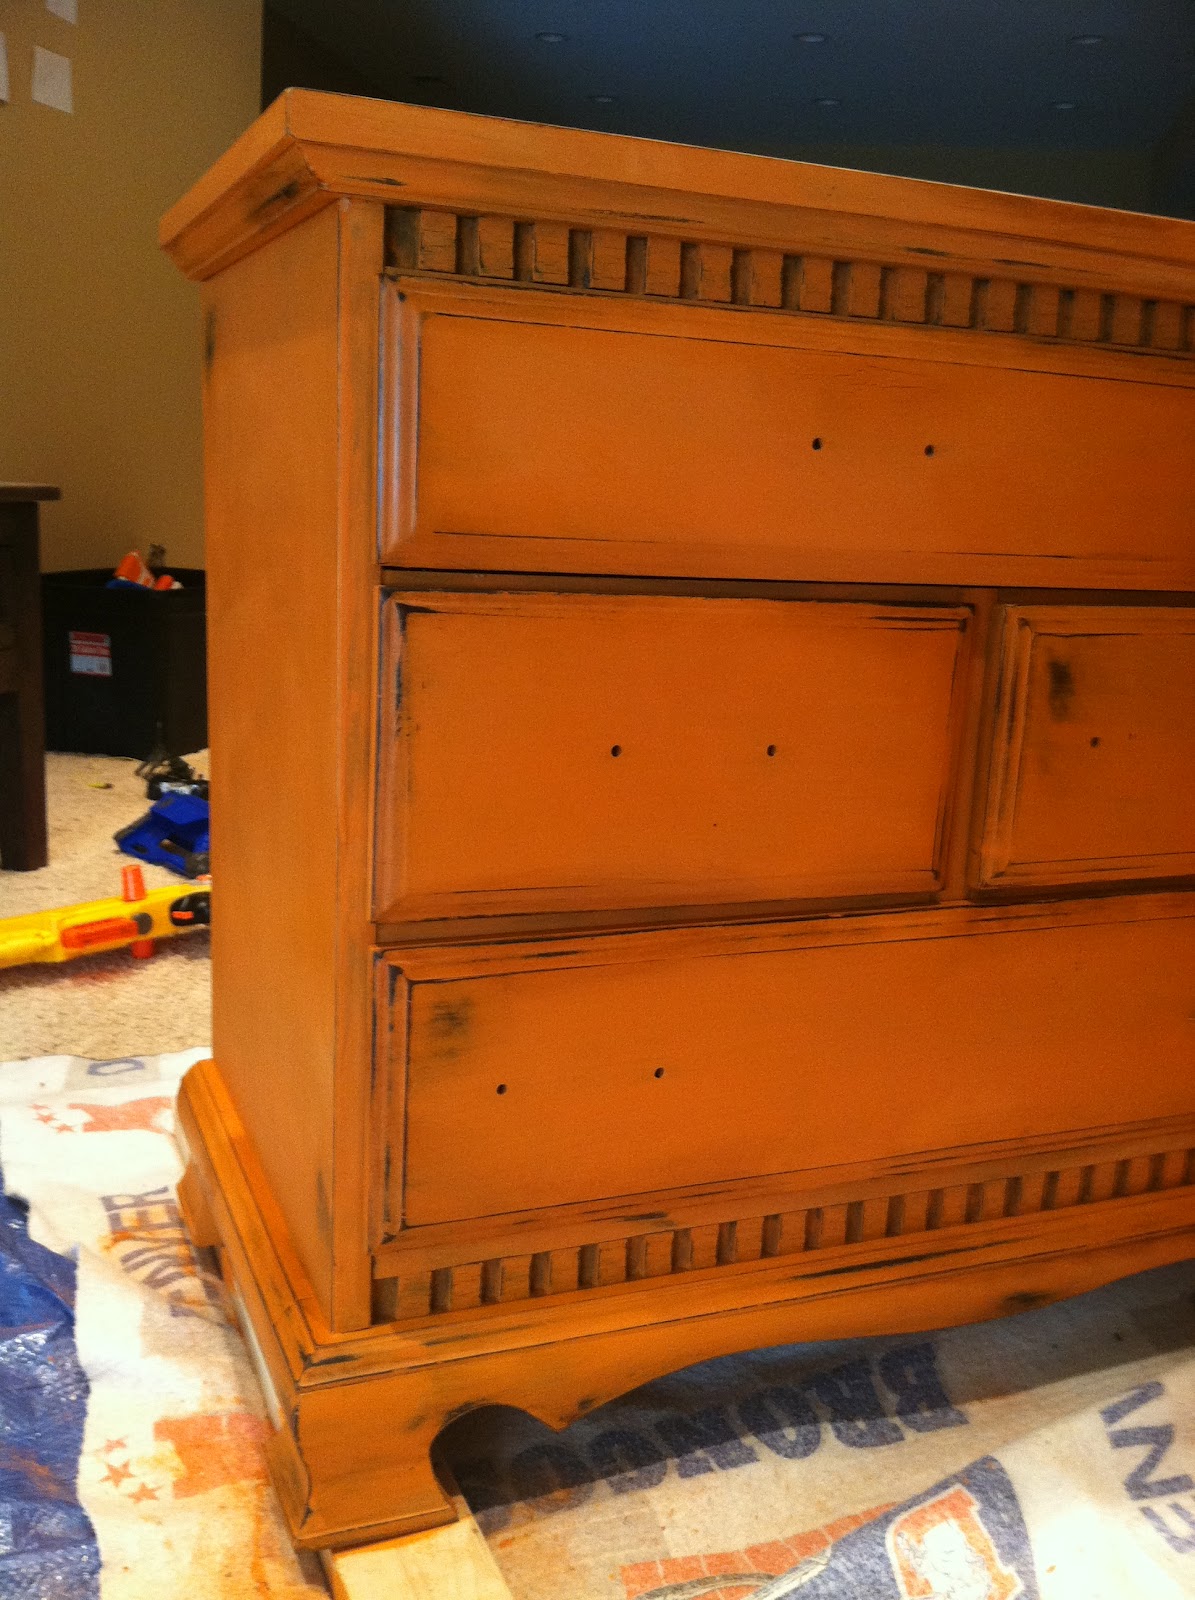
After two coats of paint I started the sanding process. This paint is awesome for sanding off spots to make it look distressed. It comes right off! This was kind of the fun, artsy part of the process. Here is how it looked after the sanding. Ready for the wax!
After a clear coat of wax and dark wax in the spots where I wanted it, I let it dry and added the new hardware that I purchased on Ebay for cheap. Oh, also, I lined the drawers with pretty liner paper that I scored at TJ Maxx for cheap. Love me some cheap items in case you couldn't tell. HA
So finally, viola! Finished product! I really enjoyed this whole process. This chalk paint was amazing to use and I highly recommend it if you are going for this distressed look on furniture. The no prep work is to die for. It was a quick and easy project and I love the difference that the paint made on this chest. It looks perfect in our basement now!
BEFORE & AFTER!


Too funny! I have a seven piece bedroom set, and there's not a thing wrong with it, but the color. The stain makes it look orangey. You have inspired me with this do-over, to see it in a new light!
ReplyDeleteThanks!